Quick Spicy Dragon Chicken Recipe for Better Than Takeout Cravings
Quick spicy dragon chicken recipe satisfies better than takeout—bold flavor in every bite. If you crave crispy chicken with spicy sauce, but hate soggy results, this fixes it. After making this many times, I learned breading method and sauce timing matter most. The chicken stays hot and crisp, the sauce is fiery and glossy. For another bold dinner, see my Tender Braised Lamb Shanks with Red Wine Sauce. Jump to the recipe card or keep reading for my best tips. If you love recipes like this, you’ll also enjoy Tender Braised Lamb Shanks with Red Wine Sauce and Easy Cookies and Cream Cake Recipe for Chocolate Lovers.
Why This Quick Spicy Dragon Chicken Recipe for Better Than Takeout Cravings Is Pure Comfort
- No soggy chicken thanks to quick stovetop sear.
- Sauce coats every bite without making breading mushy.
- Bold, balanced heat—adjustable for mild or fiery taste.
- Uses simple pantry ingredients for weeknight speed.
What You'll Need for Quick Spicy Dragon Chicken Recipe for Better Than Takeout Cravings
Choosing the right ingredients makes a big difference, but this recipe is forgiving enough to work with what you have.
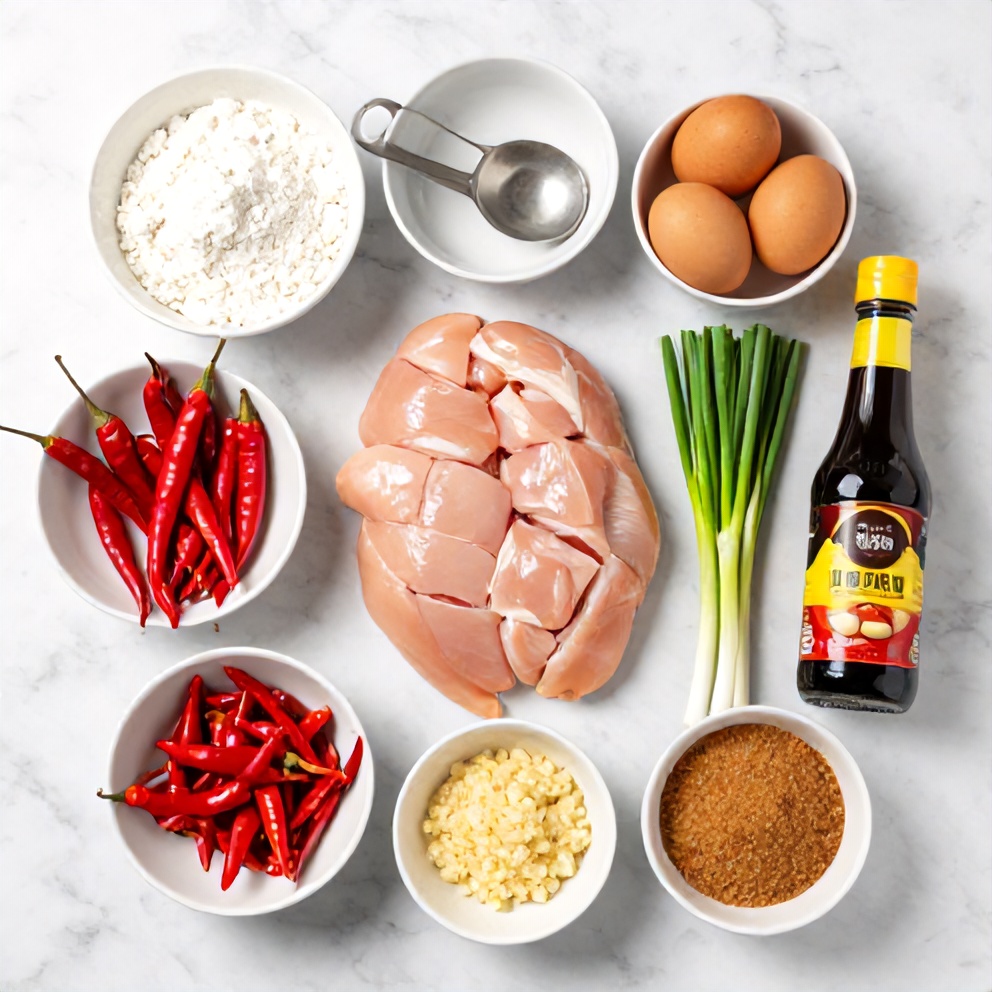
- 1 lb boneless skinless chicken breast, cut into 1-inch pieces
- 1/2 cup cornstarch
- 2 large eggs, beaten
- 2 tablespoons vegetable oil (for frying)
- 3 green onions, sliced (white and green parts separated)
- 3–4 dried red chilies, broken in half (optional, for extra heat)
- 3 cloves garlic, finely minced
- 1 inch fresh ginger, grated
- 2 tablespoons soy sauce
- 1 tablespoon rice vinegar
- 2 tablespoons ketchup
- 1 tablespoon chili garlic sauce
- 1 tablespoon brown sugar
- 1 teaspoon toasted sesame oil
- 1/2 teaspoon crushed red pepper flakes (optional)
- Salt and black pepper, to taste
- Optional: Toasted sesame seeds
- Optional: Extra sliced green onions
- Optional: Thinly sliced red chilies
📝 Ingredient Notes
- Chicken breast: Cut chicken into even 1-inch cubes for consistent cooking—you want moist, juicy pieces, not dry scraps.
- Cornstarch: Provides the classic crispy coating; do not swap with flour if you want restaurant-style texture.
- Soy sauce: Low-sodium soy keeps the sauce from getting too salty when reduced on heat.
- Chili garlic sauce: Adjust the amount for milder heat or add extra red chilies for a fiery version.
🛒 Tools & Equipment I Recommend
- Nonstick skillet — Prevents sticking and uneven browning—pays for itself by delivering truly crispy breading every time. → See on Amazon
- Instant-read thermometer — Ensures chicken hits 165°F—prevents dry, rubbery meat or undercooking. → See on Amazon
How to Make Quick Spicy Dragon Chicken Recipe for Better Than Takeout Cravings
- Prep chicken: Pat chicken pieces dry with paper towels. Toss with a big pinch of salt and pepper.
- Coat chicken: Dip chicken pieces in beaten egg, then dredge in cornstarch, pressing to coat each piece well.
- Heat skillet: Heat vegetable oil in a large nonstick skillet over medium-high until shimmering hot but not smoking.
- Cook chicken: Add chicken in a single layer. Fry for 3–4 minutes per side until golden, crisp, and cooked through to 165°F. Remove to paper towel-lined plate.
- Make sauce: Wipe skillet, add 1 teaspoon oil if needed. Sauté white part of green onion, garlic, ginger, and dried chilies for 1 minute until fragrant.
- Combine sauce ingredients: Stir in soy sauce, rice vinegar, ketchup, chili garlic sauce, brown sugar, sesame oil, and crushed red pepper flakes. Simmer 2–3 minutes until bubbling and glossy.
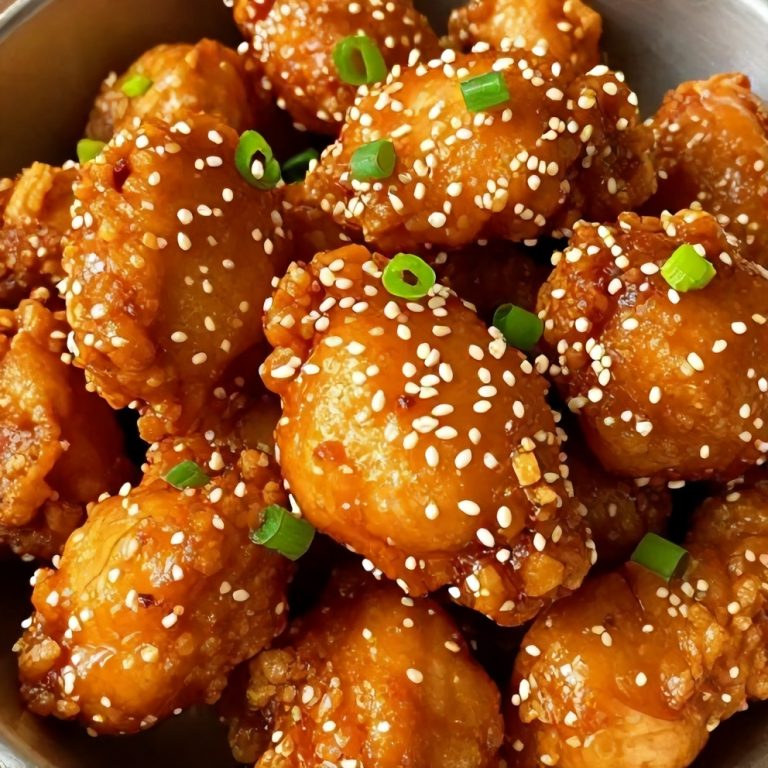
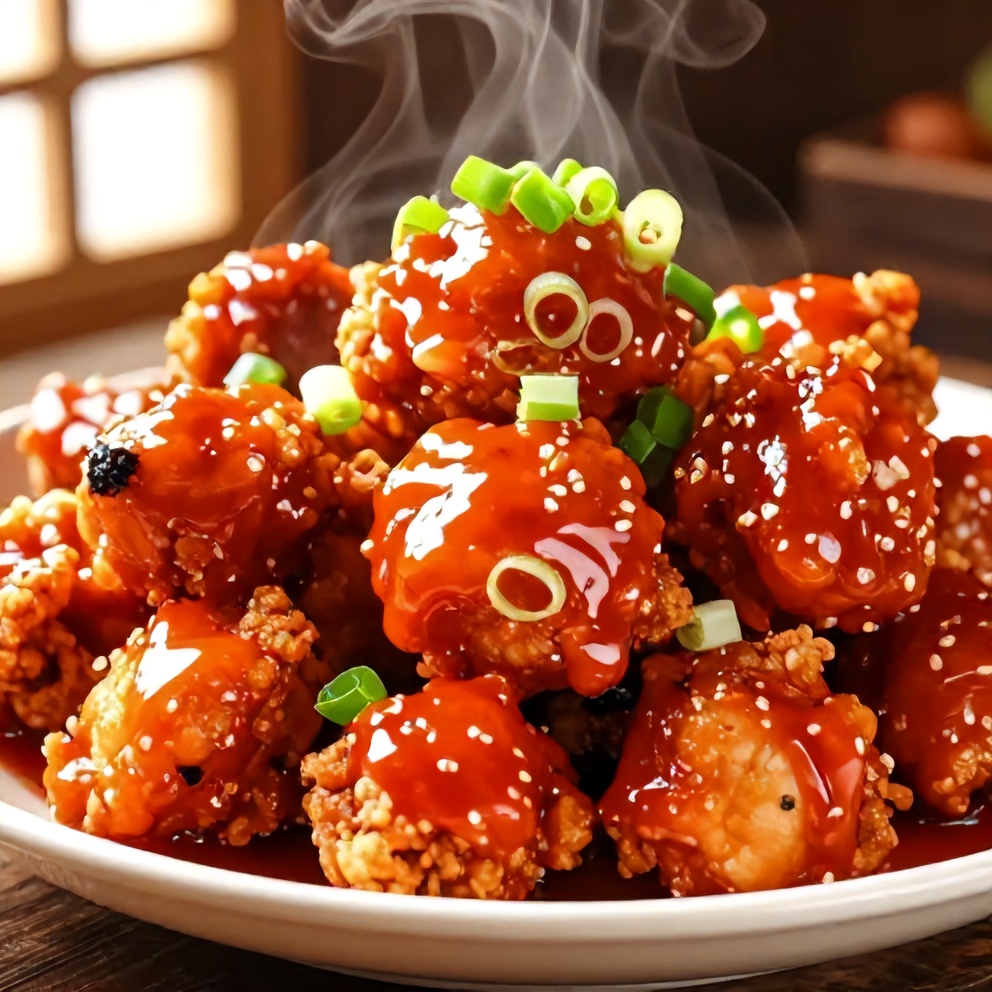
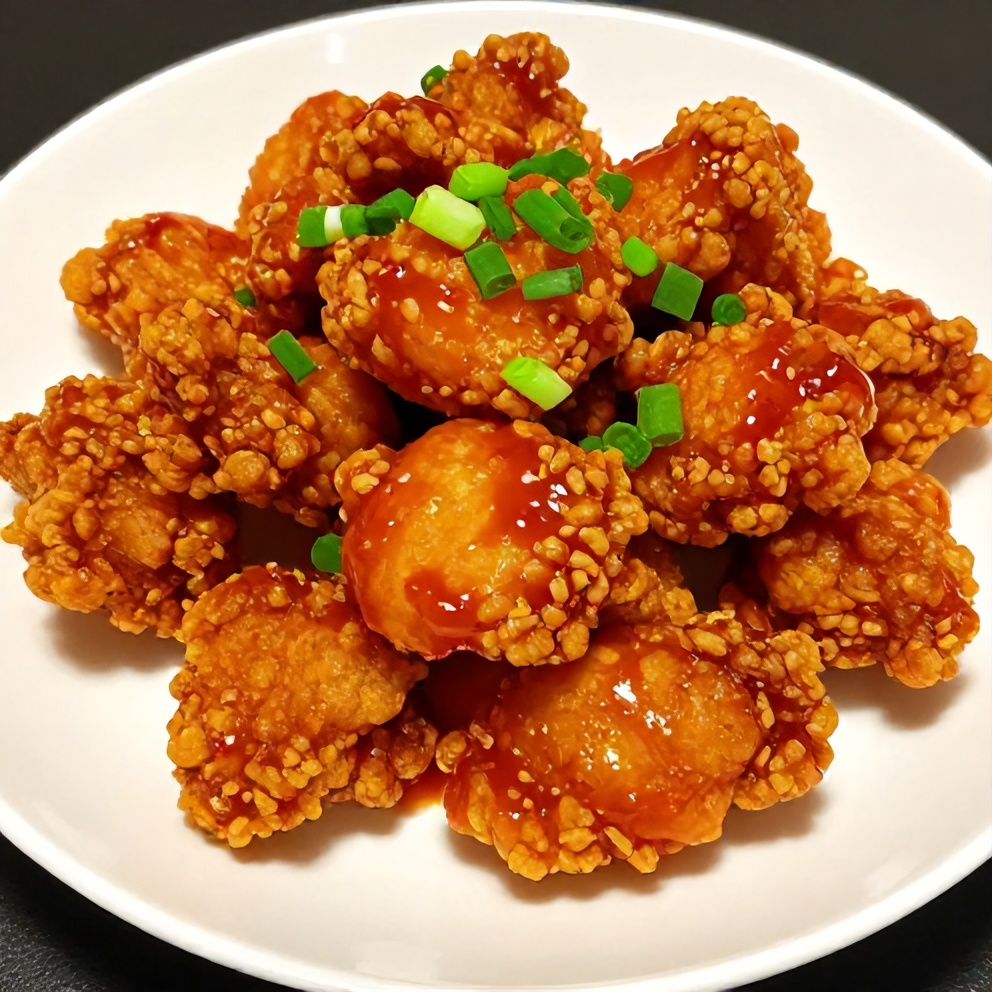
- Finish chicken: Return chicken to pan, tossing swiftly to coat in sauce without lingering. Sprinkle green onion tops over, then serve immediately with optional toppings.
Cook's Tips for Perfect Quick Spicy Dragon Chicken Recipe for Better Than Takeout Cravings
- Crispy texture: Dry your chicken thoroughly and use cornstarch for the lightest, crispiest crust. Wet chicken leads to sogginess.
- Common mistake and fix: The #1 reason this recipe fails is soggy breading from adding chicken to sauce too early. Always toss chicken in sauce just before serving to keep every bite crisp.
- Spicy heat control: Add more or less chili garlic sauce and dried chilies to match your preferred spice level without altering flavor balance.
- Sauce thickness: Let the sauce bubble until slightly thick before adding chicken—if too runny, it will soak the breading.
Storing & Reheating Quick Spicy Dragon Chicken Recipe for Better Than Takeout Cravings
Short-Term Storage
Store in an airtight container in the fridge. Store leftovers in a tightly sealed container for up to 3 days. Make-ahead tip: You can bread and fry chicken up to a day ahead—wait to toss in sauce until ready to serve.
Freezing Quick Spicy Dragon Chicken Recipe for Better Than Takeout Cravings
Freeze cooked, cooled chicken in a single layer then transfer to airtight bag—keeps up to 2 months.
How to Reheat Without Drying It Out
Oven: Bake at 375°F for 8–10 minutes until hot and crispy, turning once. Microwave: Microwave on a plate in 30-second bursts; coating will be softer, but flavor holds up.
Recipe Notes
- Chef tip: Work in batches and never crowd the pan—otherwise chicken steams instead of frying crisp.
- Best substitution: Chicken thighs work beautifully if you want even juicier, deeper flavor.
- Make-ahead: Bread and fry chicken a day early, refrigerate, then finish with sauce right before eating for max crunch.
- Scaling: Double ingredients but cook chicken in multiple batches. Sauces scale easily without losing flavor.
- Troubleshooting: If breading starts to fall off, your oil may not be hot enough. Wait for visible shimmer before adding chicken.
Want to level up this recipe?
Fish spatula — Slides under delicate crispy chicken without tearing off the crust—essential for perfect golden pieces. → Check price on Amazon
Quick Spicy Dragon Chicken Recipe for Better Than Takeout Cravings
Ingredients
Main Ingredients
- 1 lb boneless skinless chicken breast, cut into 1-inch pieces
- 1/2 cup cornstarch
- 2 large eggs, beaten
- 2 tablespoons vegetable oil (for frying)
- 3 green onions, sliced (white and green parts separated)
- 3–4 dried red chilies, broken in half (optional, for extra heat)
Seasonings
- 3 cloves garlic, finely minced
- 1 inch fresh ginger, grated
- 2 tablespoons soy sauce
- 1 tablespoon rice vinegar
- 2 tablespoons ketchup
- 1 tablespoon chili garlic sauce
- 1 tablespoon brown sugar
- 1 teaspoon toasted sesame oil
- 1/2 teaspoon crushed red pepper flakes (optional)
- Salt and black pepper, to taste
Optional Toppings
- Toasted sesame seeds
- Extra sliced green onions
- Thinly sliced red chilies
Instructions
- Prep chicken: Pat chicken pieces dry with paper towels. Toss with a big pinch of salt and pepper.
- Coat chicken: Dip chicken pieces in beaten egg, then dredge in cornstarch, pressing to coat each piece well.
- Heat skillet: Heat vegetable oil in a large nonstick skillet over medium-high until shimmering hot but not smoking.
- Cook chicken: Add chicken in a single layer. Fry for 3–4 minutes per side until golden, crisp, and cooked through to 165°F. Remove to paper towel-lined plate.
- Make sauce: Wipe skillet, add 1 teaspoon oil if needed. Sauté white part of green onion, garlic, ginger, and dried chilies for 1 minute until fragrant.
- Combine sauce ingredients: Stir in soy sauce, rice vinegar, ketchup, chili garlic sauce, brown sugar, sesame oil, and crushed red pepper flakes. Simmer 2–3 minutes until bubbling and glossy.
- Finish chicken: Return chicken to pan, tossing swiftly to coat in sauce without lingering. Sprinkle green onion tops over, then serve immediately with optional toppings.
Notes
- Chef tip: Work in batches and never crowd the pan—otherwise chicken steams instead of frying crisp.
- Best substitution: Chicken thighs work beautifully if you want even juicier, deeper flavor.
- Make-ahead: Bread and fry chicken a day early, refrigerate, then finish with sauce right before eating for max crunch.
- Scaling: Double ingredients but cook chicken in multiple batches. Sauces scale easily without losing flavor.
- Troubleshooting: If breading starts to fall off, your oil may not be hot enough. Wait for visible shimmer before adding chicken.
Storage
- Fridge: Store leftovers in a tightly sealed container for up to 3 days.
- Freezer: Freeze cooked, cooled chicken in a single layer then transfer to airtight bag—keeps up to 2 months.
- Oven reheat: Bake at 375°F for 8–10 minutes until hot and crispy, turning once.
- Microwave reheat: Microwave on a plate in 30-second bursts; coating will be softer, but flavor holds up.
- Make ahead: You can bread and fry chicken up to a day ahead—wait to toss in sauce until ready to serve.
Nutrition Per Serving
- Calories: 410
- Protein: 32g
- Fat: 16g
- Carbs: 33g
- Fiber: 1g
- Sugar: 9g
- Sodium: 745mg
- Cholesterol: 115mg
- Sat. Fat: 2.5g
Nutritional values are estimates only. Actual values may vary by brand and portion size.
Quick Spicy Dragon Chicken Recipe for Better Than Takeout Cravings FAQs
You can bread and fry the chicken a day in advance. Store tightly covered in the fridge. Re-crisp in the oven at 375°F, then toss in fresh sauce just before serving for best results.
Sogginess usually happens if you toss chicken in sauce and let it sit. Always combine just before serving. Using wet chicken or too little oil can also prevent proper crisping—dry and coat each piece evenly, cook in a hot pan.
Yes—freeze fully cooked, cooled pieces in a single layer first, then transfer to a freezer bag. They keep crisp texture this way. For best flavor and crunch, reheat in a hot oven, then sauce last.
Homemade quick spicy dragon chicken recipe lets you control the heat. Add more chili garlic sauce for a tongue-tingling version or reduce for a milder bite. It's customizable, so you can easily make it tamer or fiery as preferred.
This recipe is an evergreen comfort food, but it's especially craveable in winter when you want something cozy and bold. Try it with steamed rice or roasted veggies to soak up the extra spicy sauce. The heat gives you a little warmth on chilly nights.
A Warm Final Note
I can’t wait for you to try Quick Spicy Dragon Chicken Recipe for Better Than Takeout Cravings and see how effortlessly it comes together. When you make it, pop back here and leave a rating or share how it turned out — I love hearing from you!